Most of the time, people do not want to regenerate an entire image.
They already like the composition, the lighting, the pose, or the product angle. They just need one thing fixed: a logo removed, a label updated, a distracting object cleaned up, a clothing detail changed, or a damaged corner repaired.
That is exactly where image mask editing helps. Instead of rebuilding the whole image, you paint the part you want to change, describe the result you want, and let the model focus on that area while keeping the rest as stable as possible.
On DreamWith, the workflow is simple:
- Upload an image
- Brush over the area you want to edit
- Describe what should appear there
- Generate and refine if needed
When mask editing is the right tool
Mask editing works best when you only want to change part of an image:
- Remove logos, subtitles, watermarks, labels, or small distractions
- Replace a product, prop, accessory, or object
- Retouch clothing, hair, jewelry, or portrait details
- Repair damaged edges, glare, scratches, or missing details
- Update ecommerce creatives without remaking the full image
- Test local visual variations on the same base composition
If you want a full style change, a new composition, or a completely different subject, full image generation is usually the better choice.
Why it feels more practical
The main advantage is not that it is flashy. It is that it is more controlled.
If your image already works and only one part feels wrong, starting over can create more problems than it solves. Mask editing gives you a narrower editing surface, which often means fewer surprises and less rework.
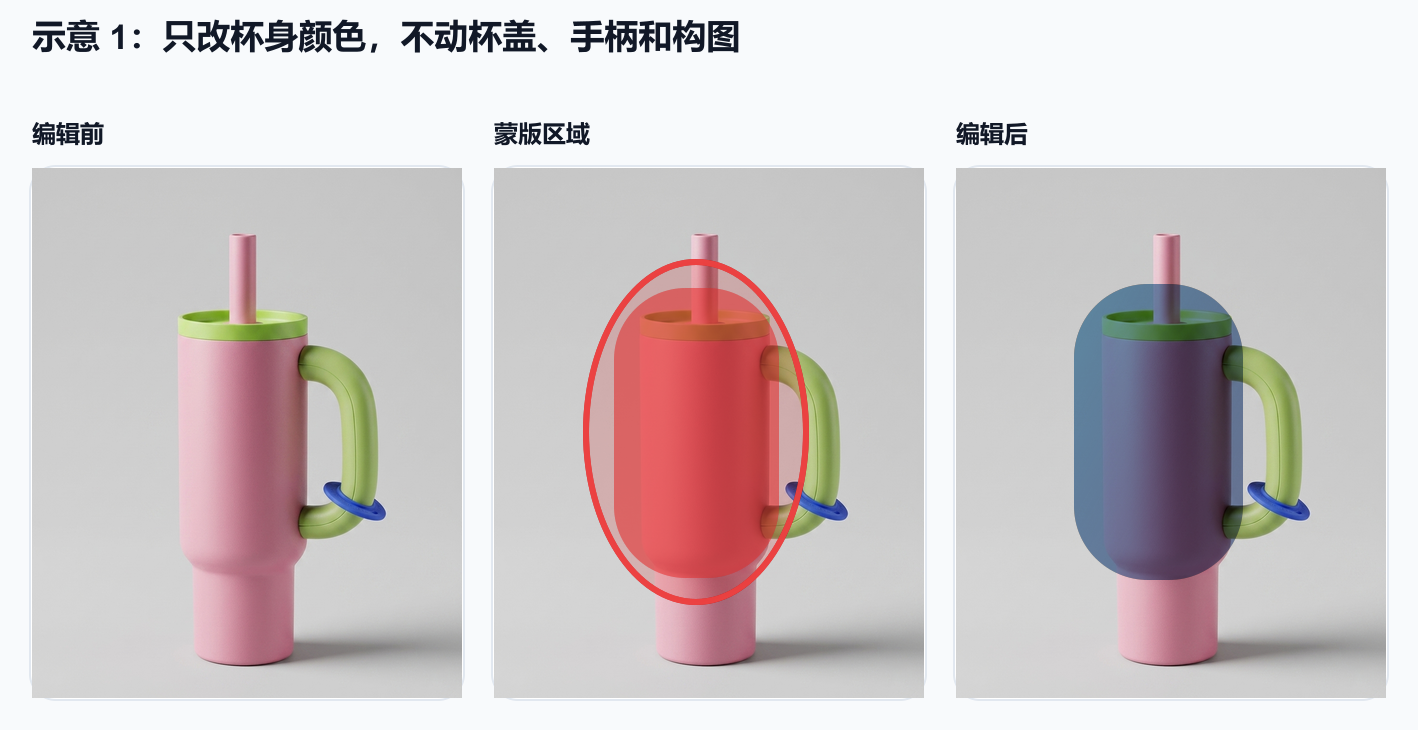
The comparison below shows the idea clearly: the source image stays the same, only the selected area is painted as a mask, and the edit is focused on that region instead of rebuilding the whole image.
This is especially useful for:
- Ecommerce teams updating product visuals
- Designers cleaning up final marketing assets
- Creators refining portraits without changing the whole face
- Teams exploring multiple local variations from one approved image
A better way to write prompts
For mask edits, the most reliable prompt pattern is:
What to change + what it should become + what should stay consistentExamples:
Remove the text in the masked area and naturally rebuild the wall texture while keeping the original lighting.Replace the masked object with a clean transparent glass vase, keeping the table perspective and shadows consistent.Change the masked jacket to black leather while preserving the pose, face, background, and overall lighting.In practice, short instructions like these help a lot:
- Keep the overall composition unchanged
- Preserve the original lighting
- Do not change the subject proportions
- Keep the rest of the image untouched
One common mistake: masking too much
People often paint a much larger area than necessary because it feels safer. Usually it is the opposite.
The larger the masked area, the more the model has to reconstruct, and the less predictable the result becomes.
A better approach is:
- Mask only the part that truly needs editing
- Leave a small buffer around the edge
- Start with a smaller correction, then do a second pass if needed
If you only want to change a product label, you usually do not need to mask the whole bottle. If you only want to remove a loose strand of hair, you usually do not need to cover the full face and shoulder area.
Best use cases right now
Ecommerce updates
Mask editing is especially practical for product labels, packaging revisions, glare cleanup, accessory swaps, and minor creative updates without rebuilding the whole visual.
Portrait and fashion retouching
It works well for changing clothing, accessories, small hair details, and subtle facial cleanup while keeping the original shot structure intact.
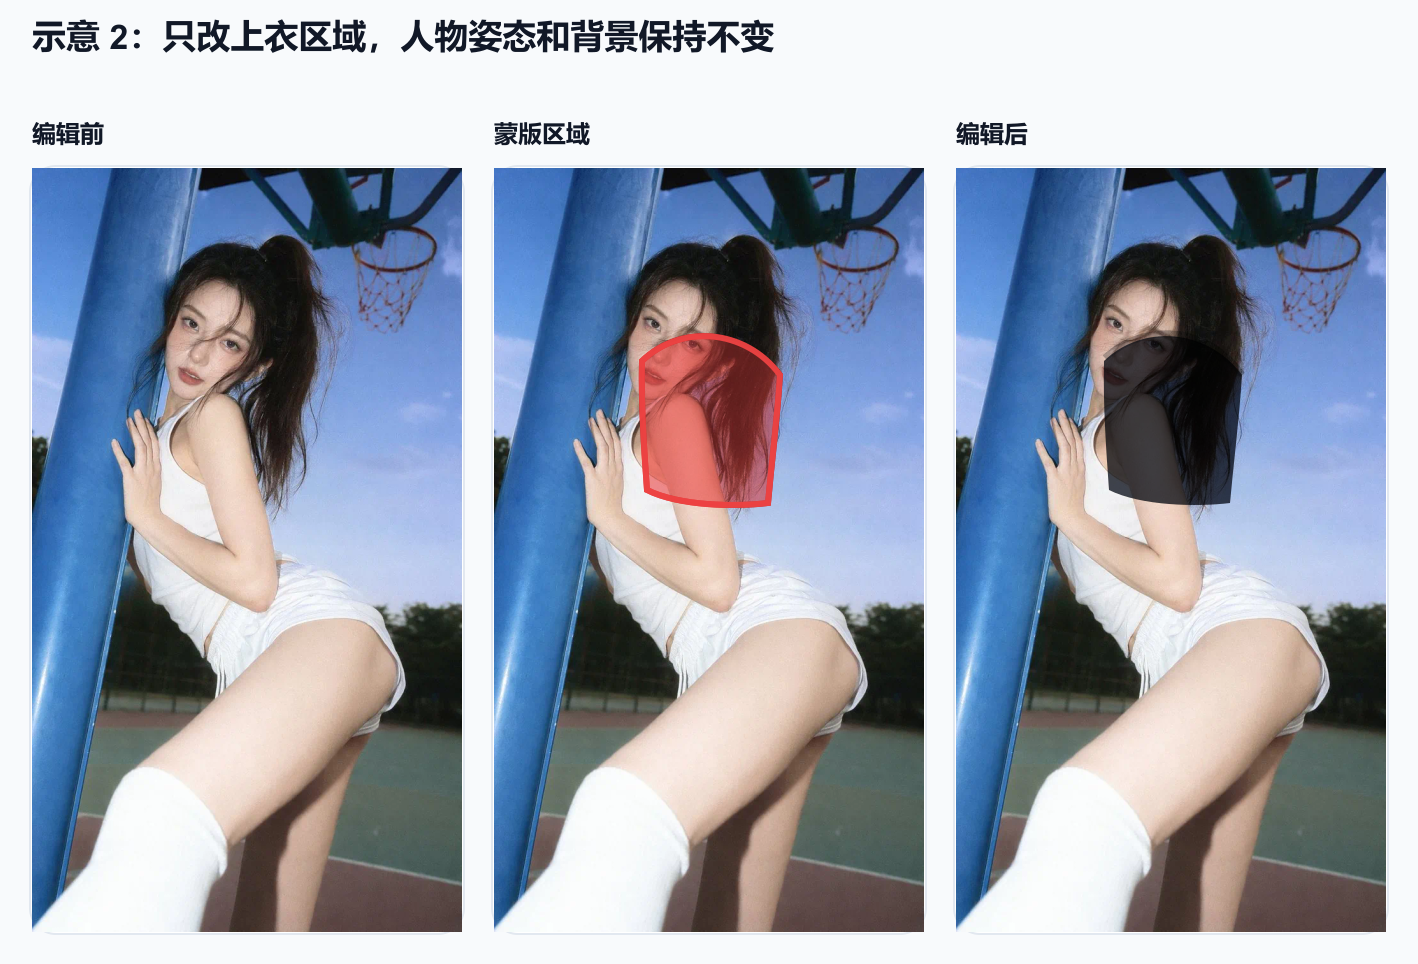
That is especially useful when you want to change only one clothing area while keeping the pose, framing, and background stable.
Posters and social assets
When an image is already close to done, mask editing is great for removing corner elements, cleaning a background, or replacing one local visual element instead of regenerating the full design.
Salvaging older images
Sometimes an image is good except for one damaged edge, one odd reflection, or one unfinished detail. Mask editing is often the fastest way to rescue it.
A simple rule of thumb
If your thought is:
- "The image is mostly fine, I just need to fix this part."
- "Everything else should stay the same."
- "I only want to replace this one thing."
then mask editing is probably the right workflow.
That is why we shipped it. In real creative work, a lot of time is spent not on making something from zero, but on getting an almost-good image to a publishable state.